Installing the ESP-IDF Installation Manager (eim)
To install ESP-IDF on macOS, we first need ESP-IDF Installation Manager (eim)that helps us install and manage different versions of ESP-IDF on our system. For macOS, we follow the recommended method of using Homebrew for installation:
brew install libgcrypt glib pixman sdl2 libslirp dfu-util cmake python
brew tap espressif/eim
brew install --cask eim-gui
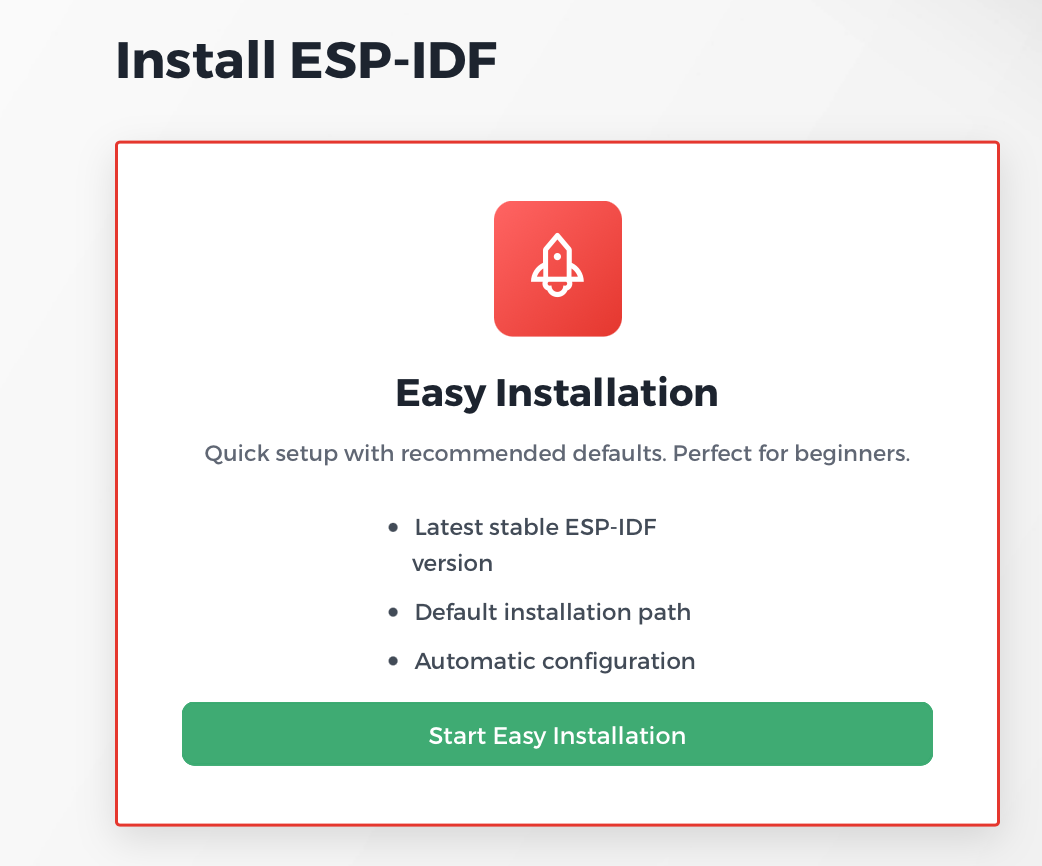
An application named eim will appear in the ~/Applications accessible from Spotlight and the Applications menu. Open it and select Easy Installation:
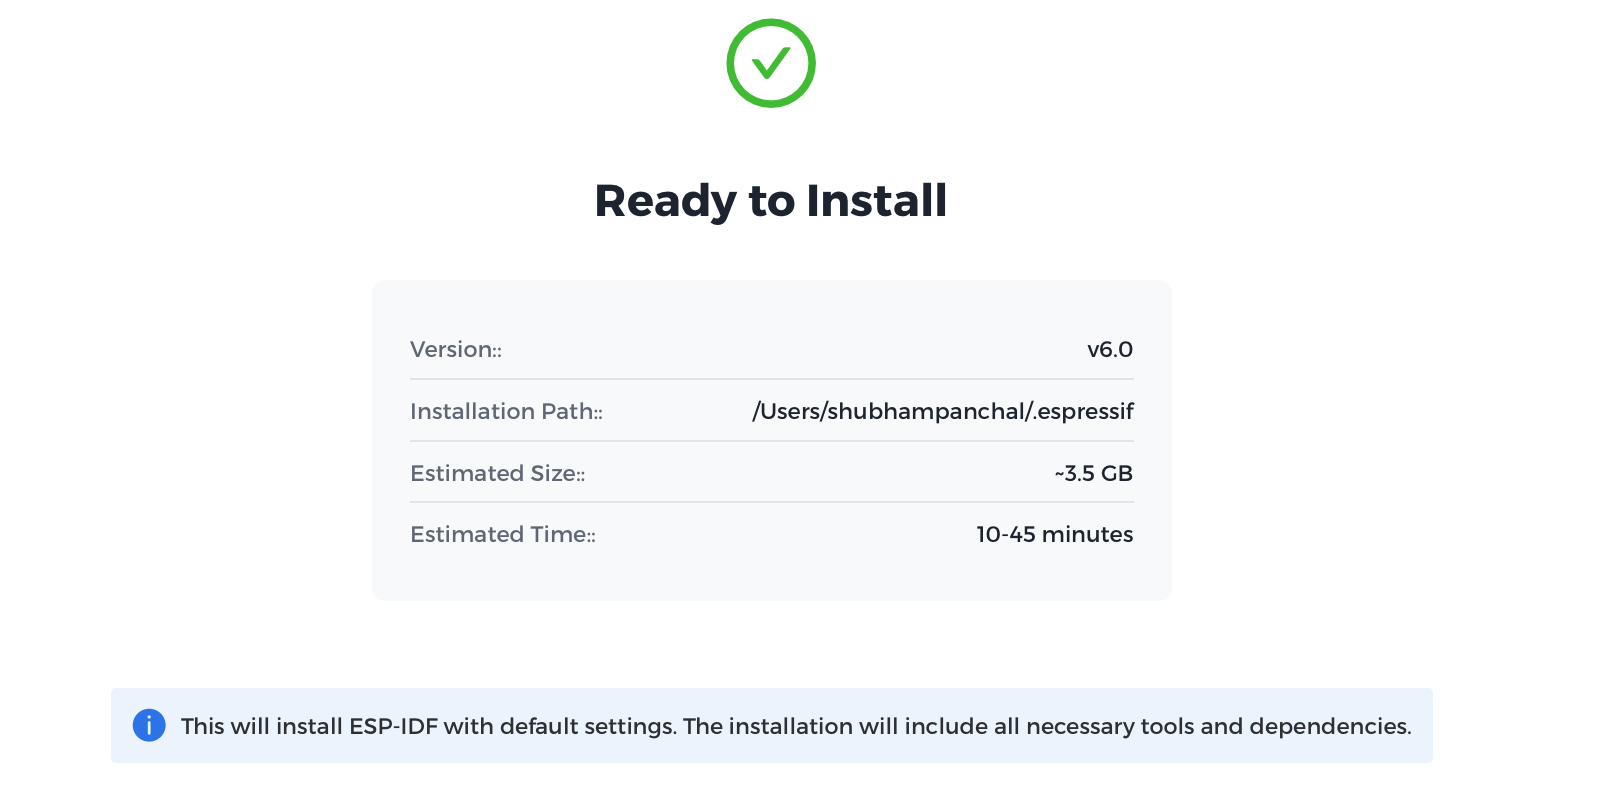
The latest stable version of ESP-IDF should be displayed along with the installation path:
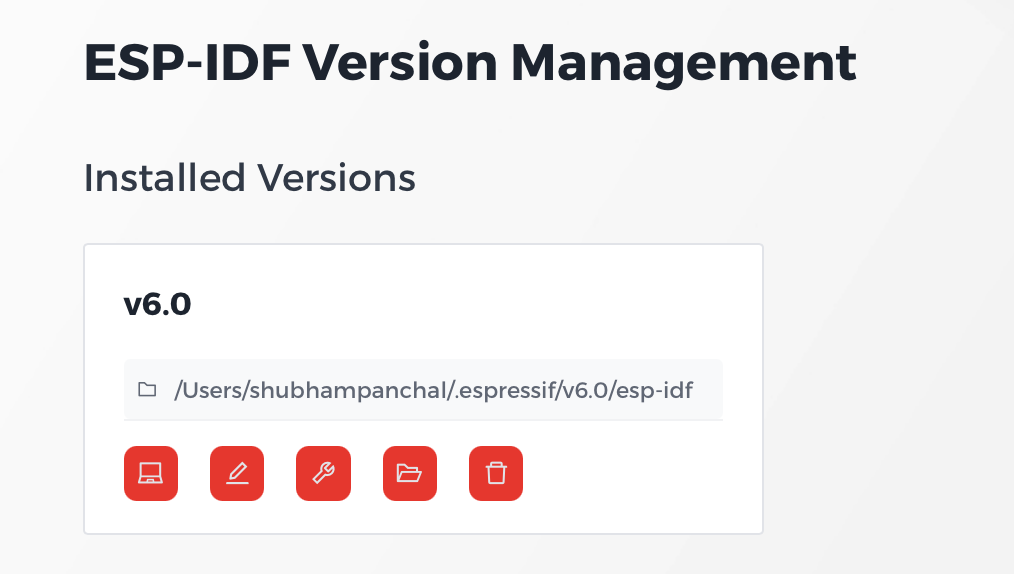
 Upon completion, the installed version should be visible in
 eim:
Setting up VSCode for ESP32 Development
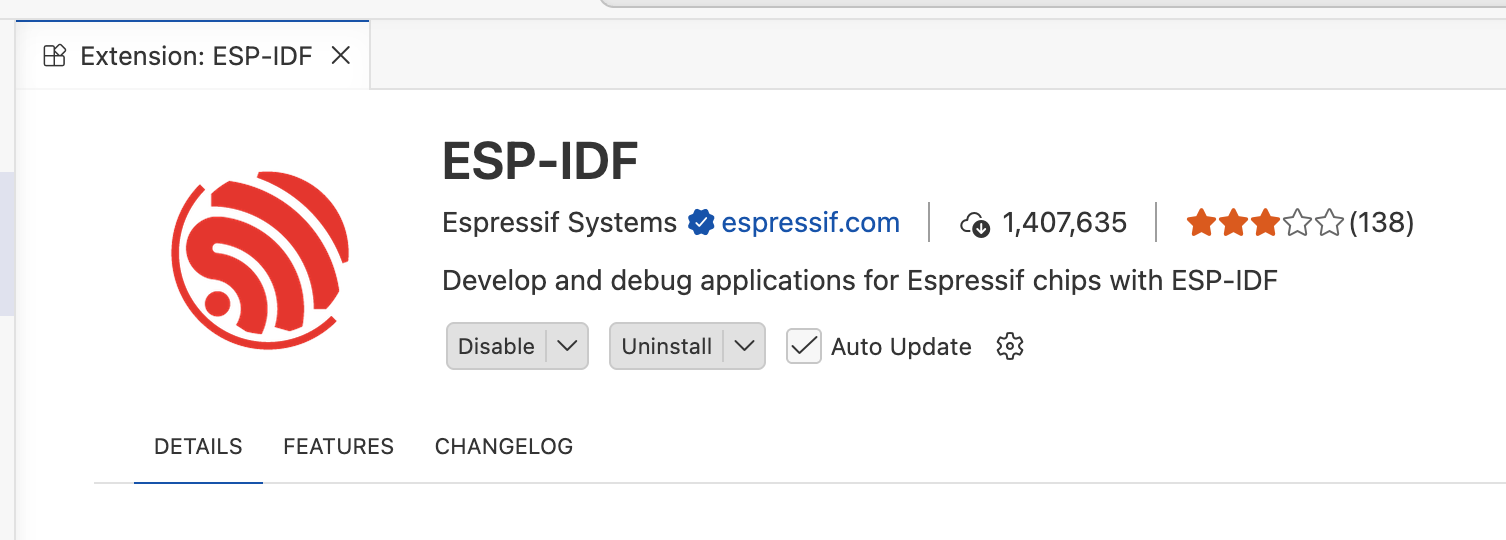
Install the ESP-IDF extension in VSCode:
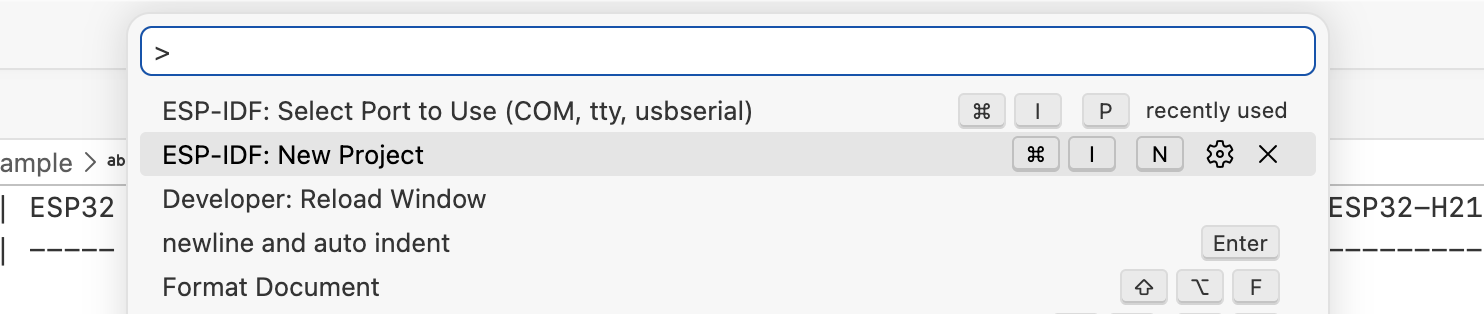
Open the command palette (Cmd + Shift + P) and select the ESP-IDF: New Project action:
Select the default ESP-IDF installation that we made in the previous steps:

A project wizard appears with pre-built templates and examples:
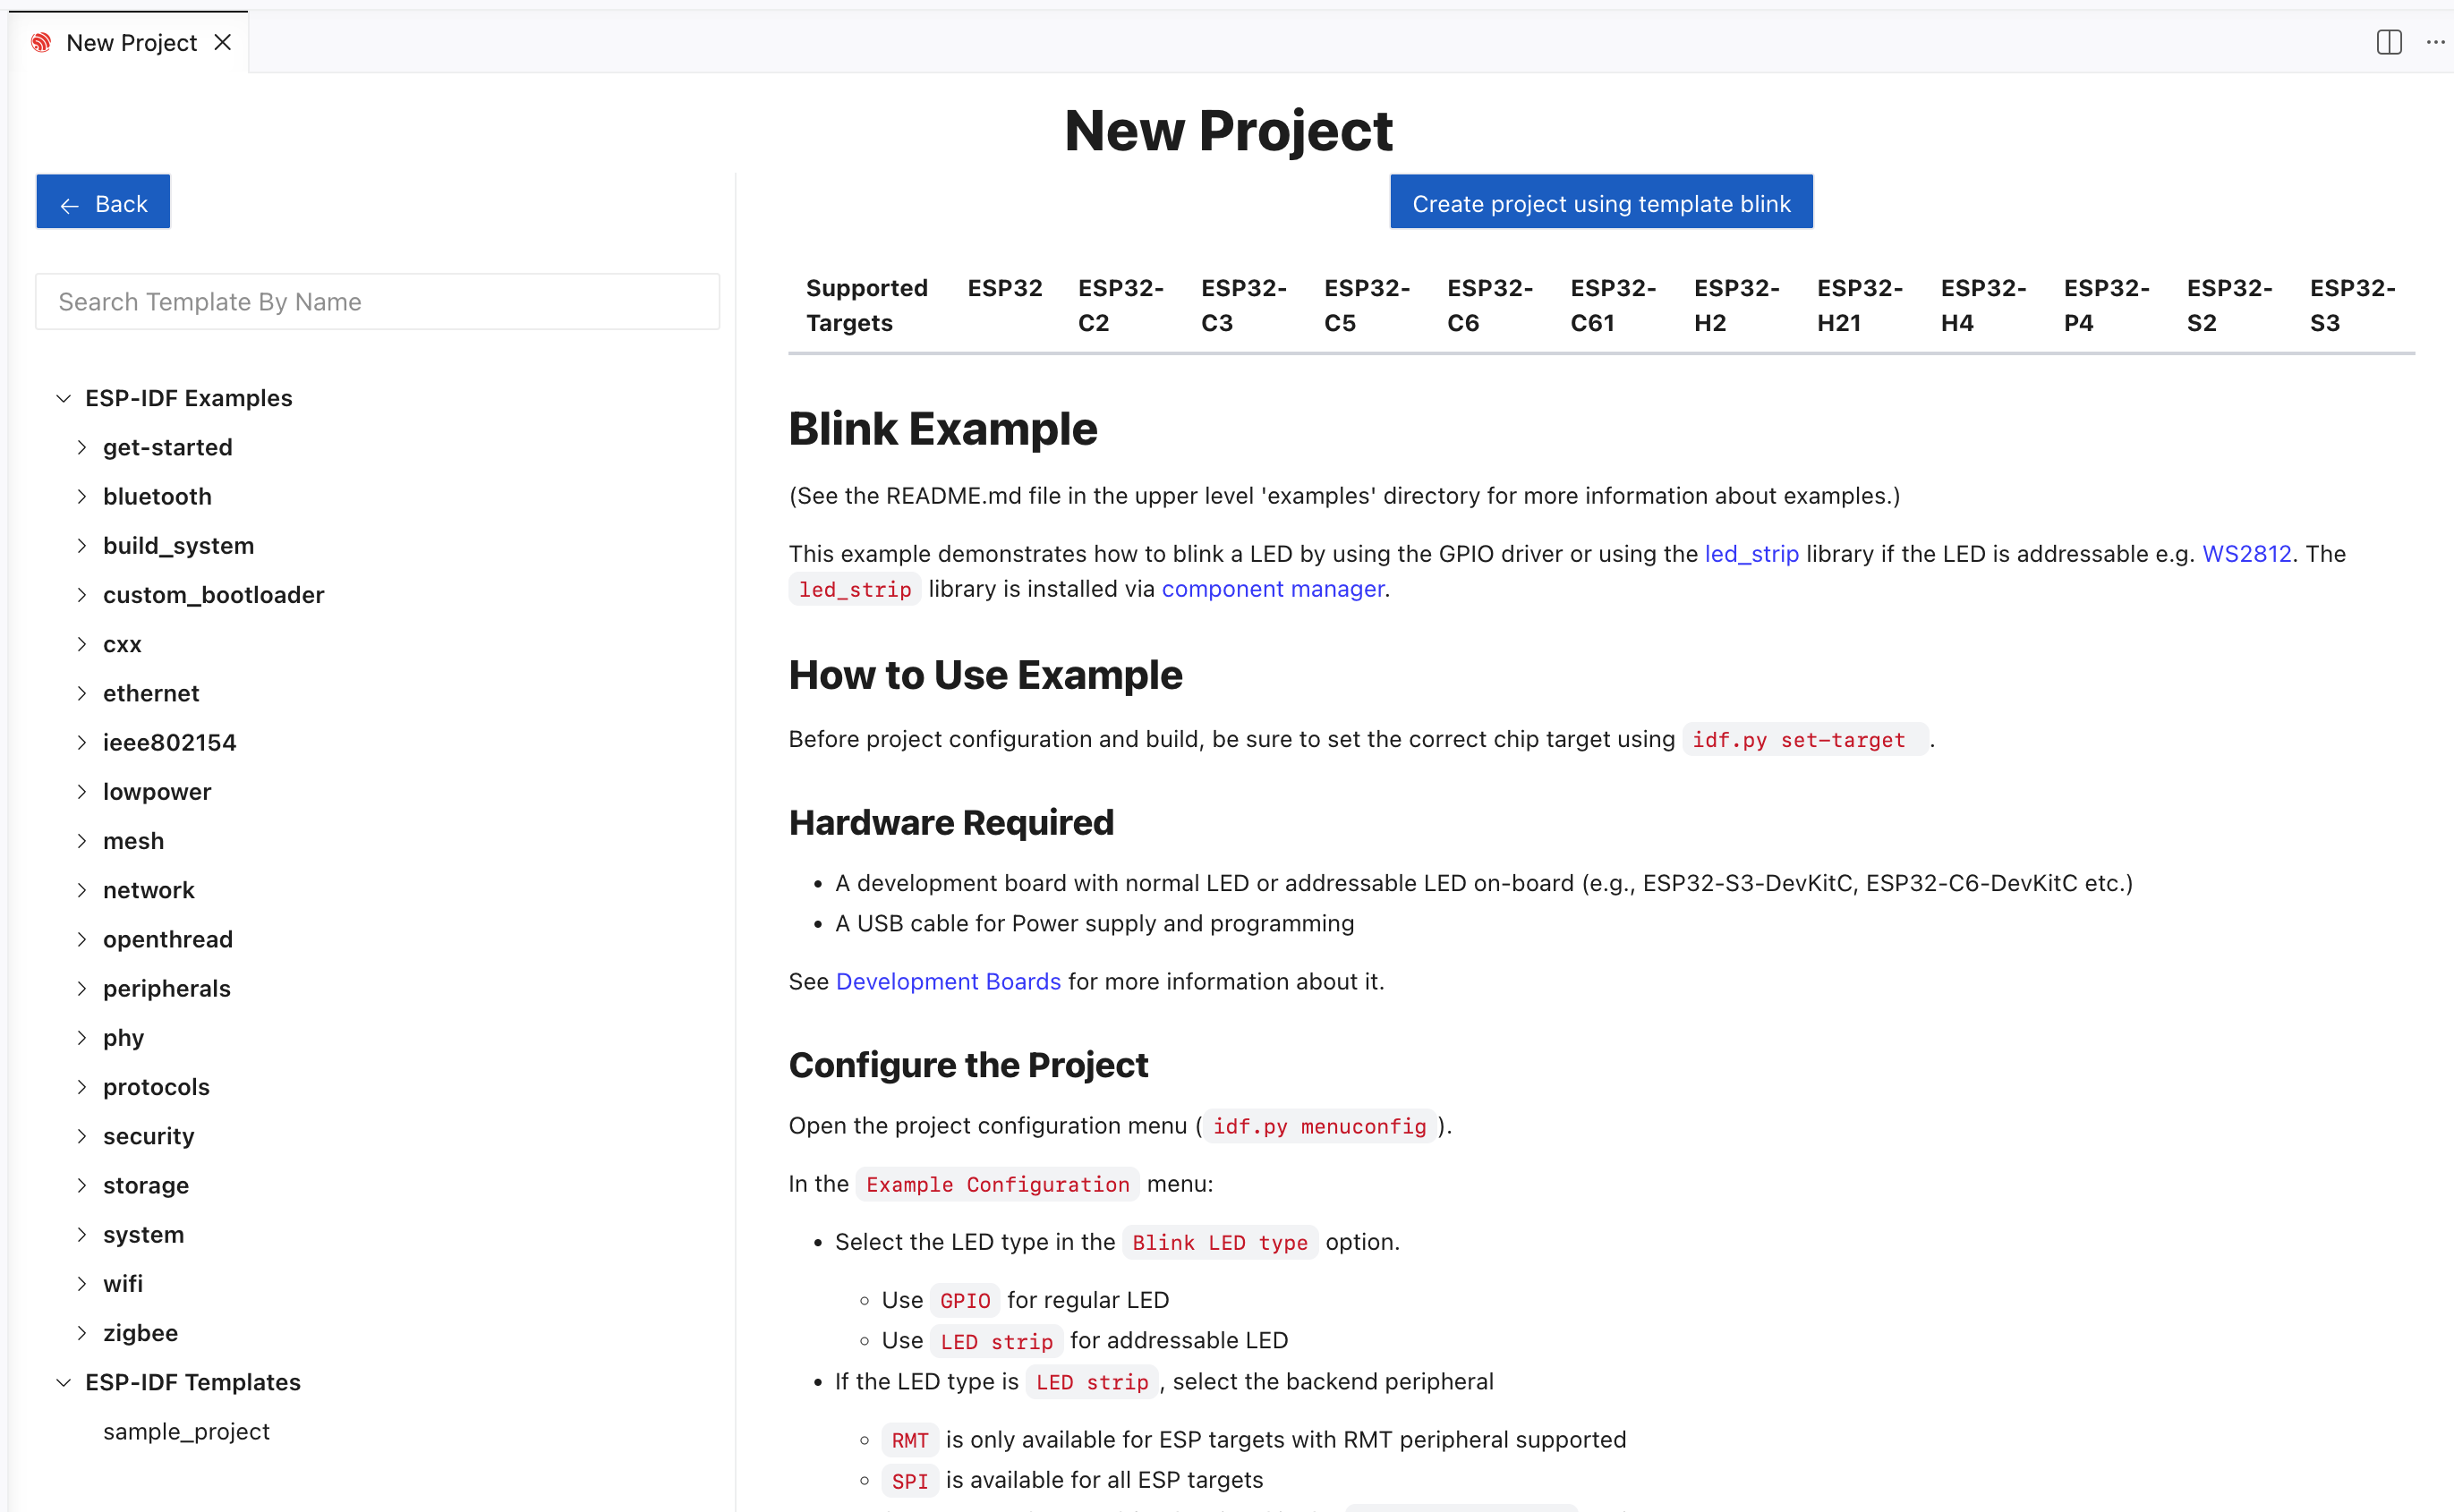
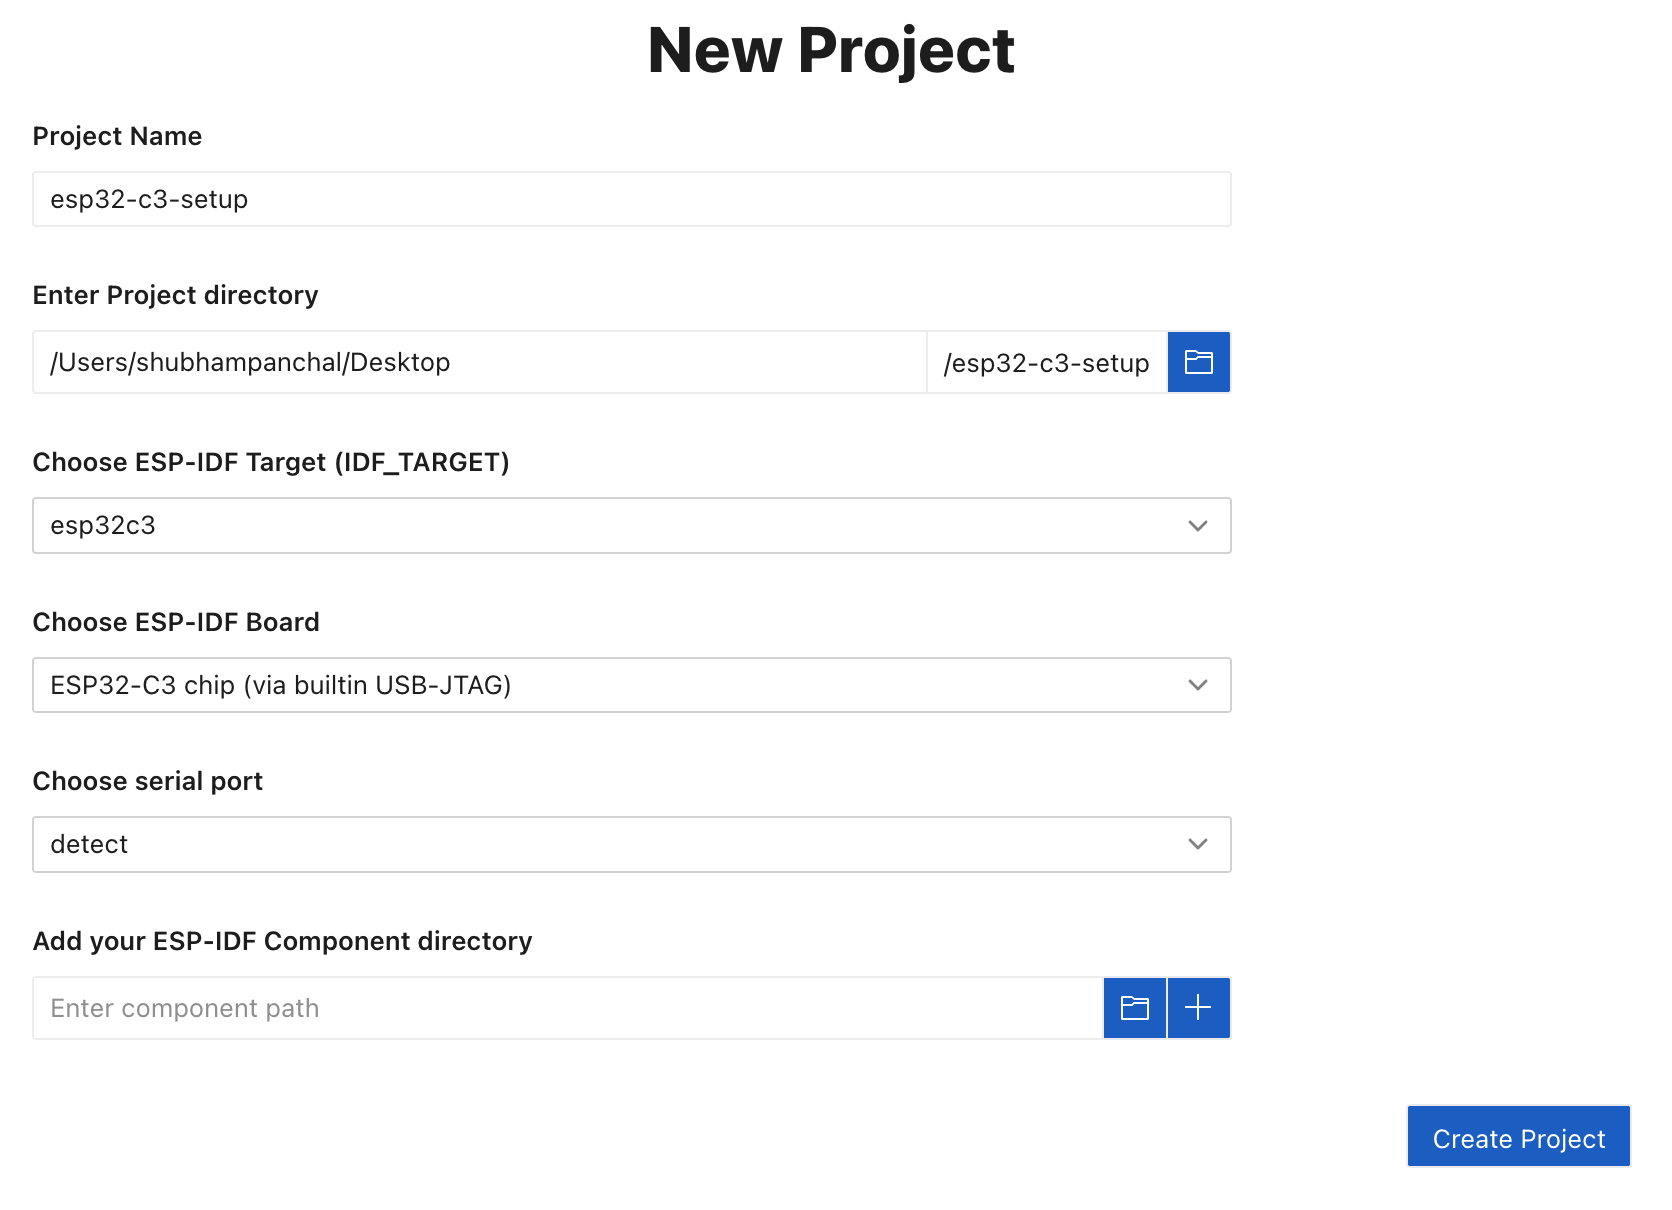
We choose the hello_world example present in get-started. In the Create Project pane, select the ESP-IDF Target as esp32c3:
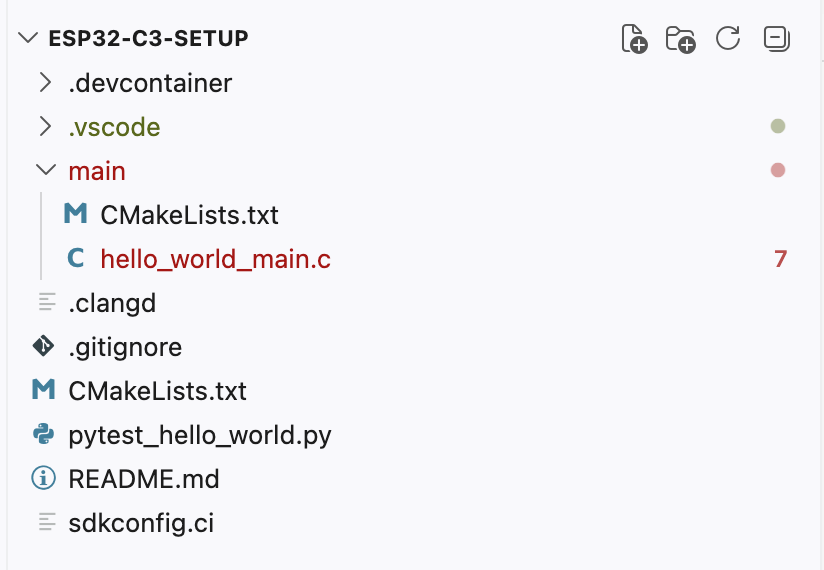
 The following files are created where
 hello_world_main.c holds the source code:
Running code on the ESP32-C3
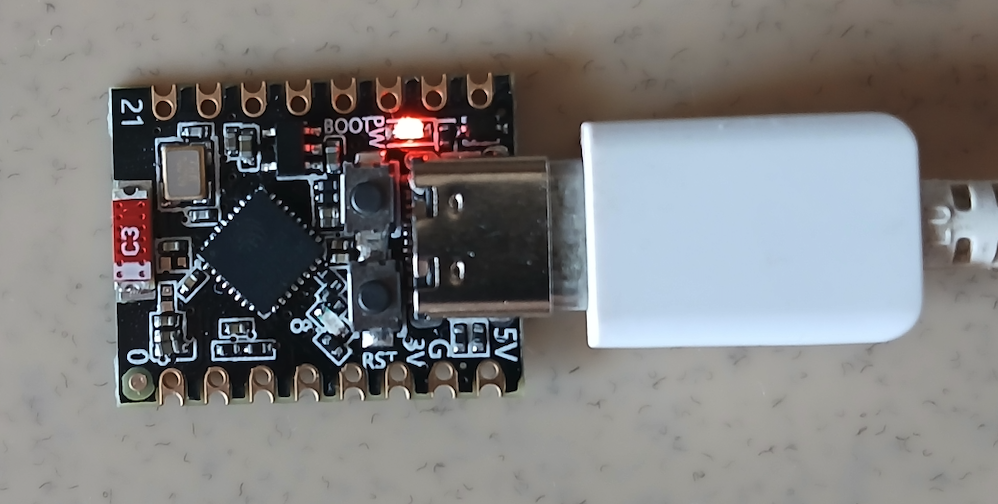
Connect your ESP32-C3 via a USB C cable to the Mac. A glowing red LED indicates that is receiving power:
The device target in the bottom left corner of VSCode should show the esp32c3:
 If not shown, click device target label and select the device manually:

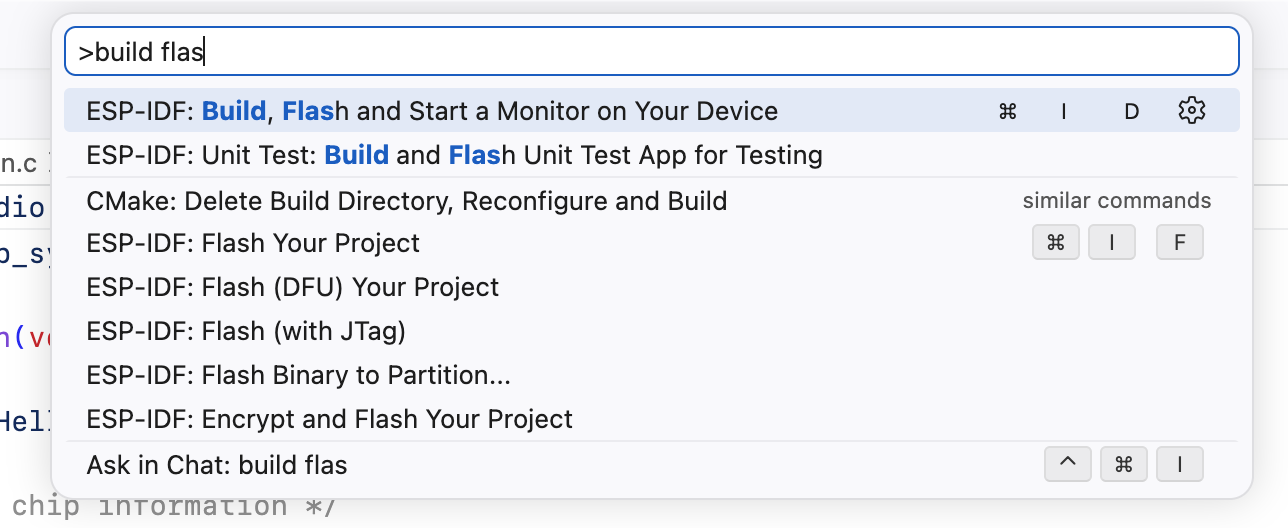
Select the ESP-IDF: Build, Flash and Start a Monitor action from the command palette
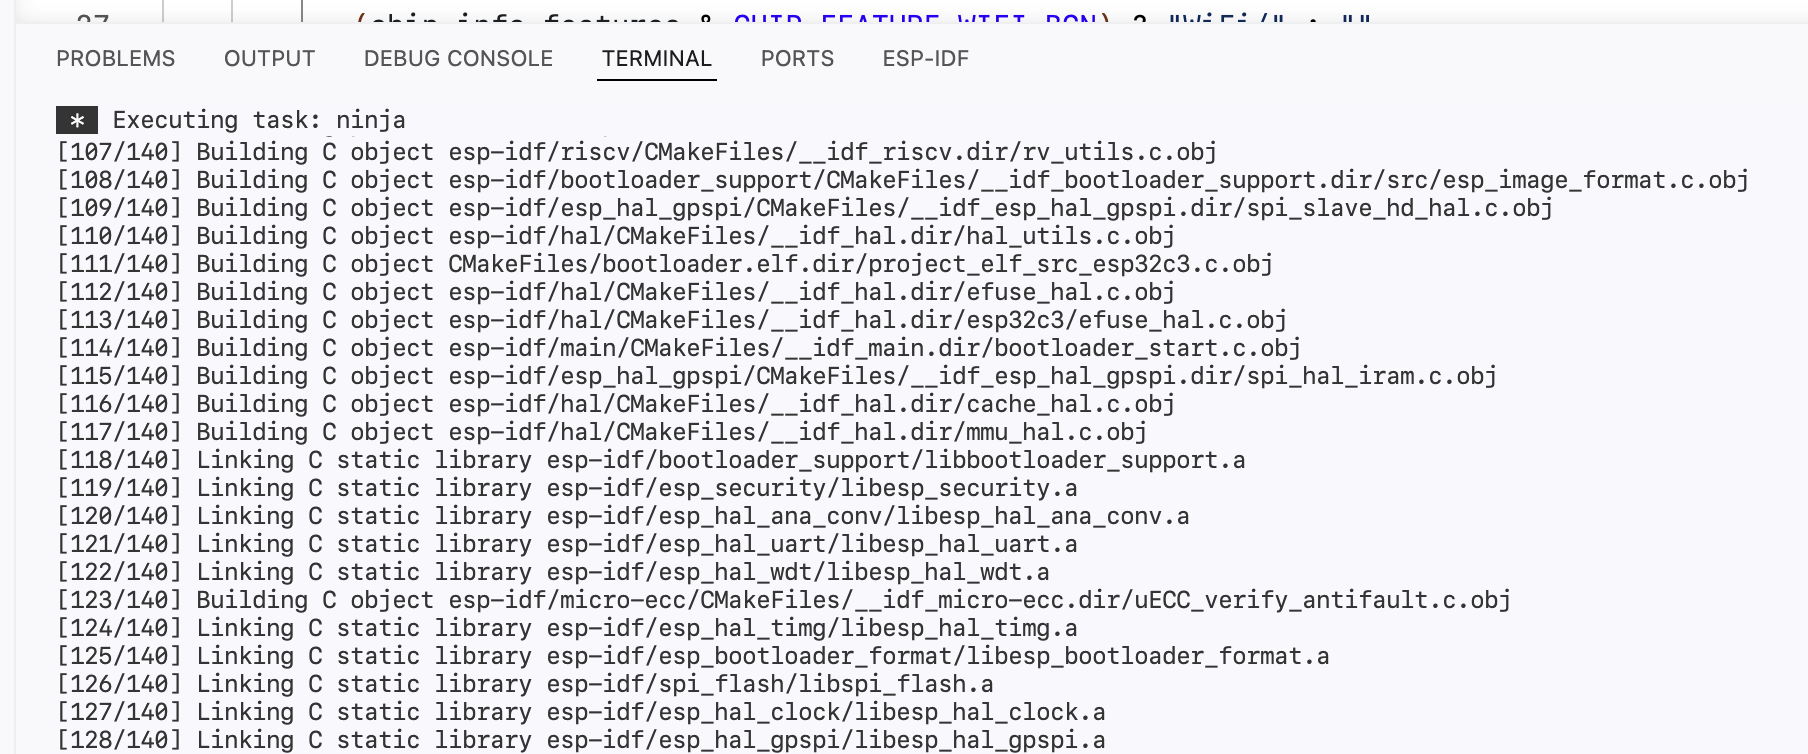
This action will start building the source code for esp32c3:
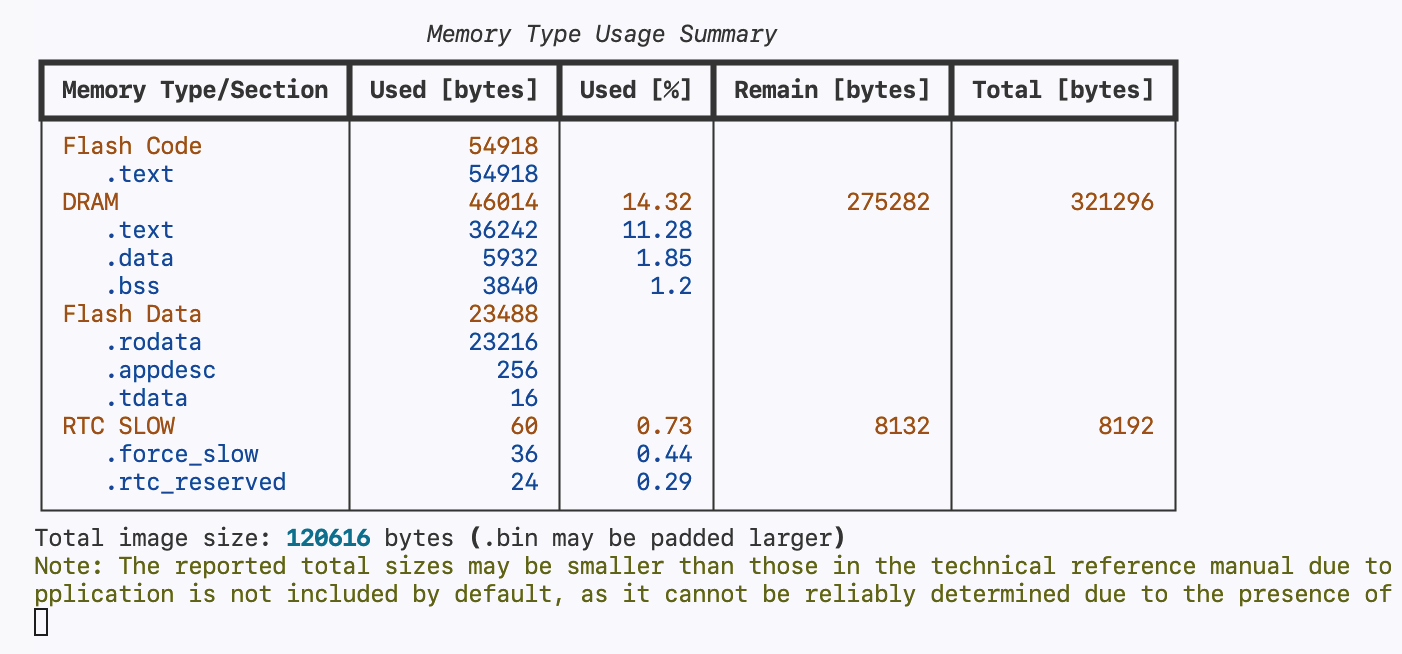
 Display information about the executable that will be flashed on the device:
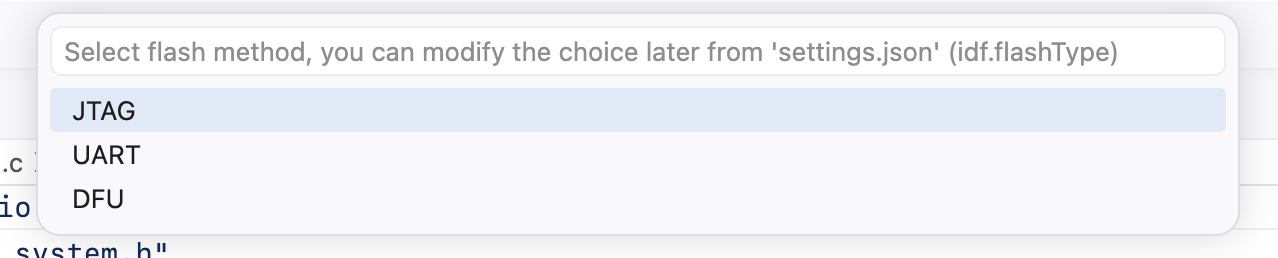
 And asks for a flash method. We select
 JTAG and proceed:
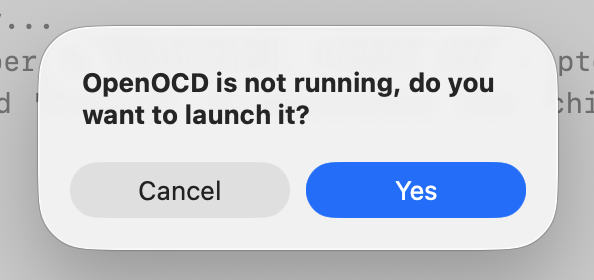
Allow the execution of the OpenOCD server:
The monitor starts and the hello world message is visible on the console:
